Are you tired of fumbling with keys every time you enter your home? Do you want to enhance the security of your household with the latest technology? Look no further than Hornbill Smart Lock – a revolutionary device that offers convenience and safety all in one. But installing this advanced system can seem daunting at first. That’s why we’ve created a comprehensive step-by-step guide to make the installation process effortless for even the most technologically challenged. Keep reading to learn how you can upgrade your home security with ease.

Introduction to the Hornbill Smart Lock: Why it’s an Upgrade for Your Home Security
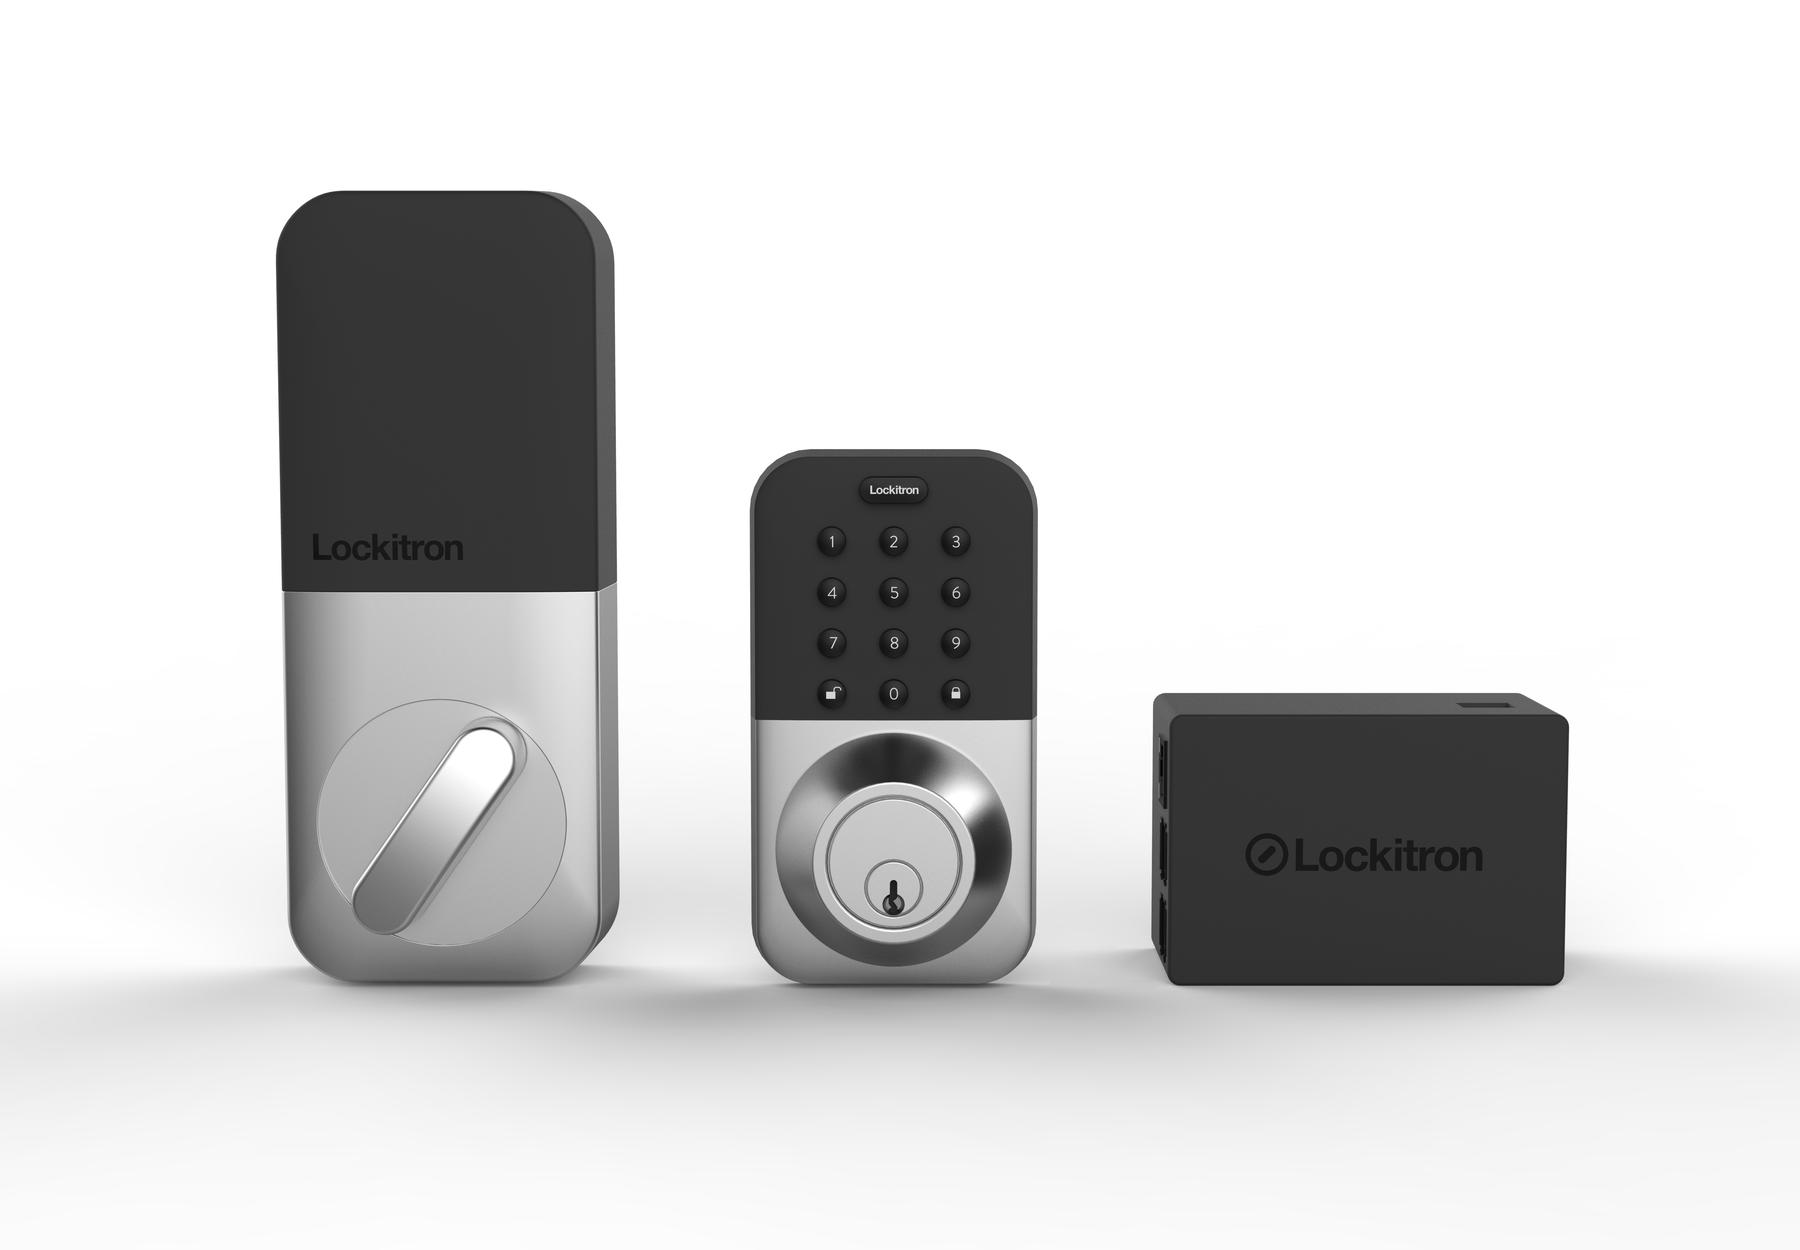
The Hornbill Smart Lock is a game-changer in home security. With its advanced features and easy-to-use interface, it’s no wonder why more and more homeowners are choosing to upgrade their traditional locks. This smart lock allows you to control access to your home from anywhere, at any time, using your smartphone or voice commands. You can grant temporary access to guests or service providers without the need for physical keys. The Hornbill Smart Lock also offers a variety of safety features such as anti-peep password protection and auto-locking capabilities. With its sleek design and user-friendly installation process, the Hornbill Smart Lock is a must-have for anyone looking to enhance their home security system.
Getting Started with Hornbill Smart Lock Installation: What You Need and How to Prepare
Before you start with the Hornbill Smart Lock installation, it’s important to gather all the necessary tools and materials. You will need a screwdriver, a drill, a measuring tape, and the lock itself. Make sure to read the instruction manual thoroughly before starting the installation process.
Next, prepare your door for the installation. Remove any existing locks or hardware from your door and ensure that the surface is clean and dry. Measure the thickness of your door to ensure that the Hornbill Smart Lock fits properly.
It’s also important to prepare your smartphone for use with the lock. Download the Hornbill app and create an account if you haven’t already done so. Make sure that your smartphone is compatible with Bluetooth 4.0 or higher.
By preparing these key elements beforehand, you can ensure a smooth and efficient installation process for your Hornbill Smart Lock.
Step-by-Step Guide to Installing the Hornbill Smart Lock
Step-by-Step Guide to Installing the Hornbill Smart Lock
To begin installing your Hornbill Smart lock, make sure that you have all the necessary tools and components, including a screwdriver, screws, latch bolt, strike plate, and batteries.
Remove the old lock: First things first – remove any previous locks from your door by unscrewing it from the door and taking out its latch bolt.
Install the new latch bolt: Take out the latch bolt of your Hornbill Smart Lock kit and position it into place on your door. Make sure to align it with the existing hole in your door before tightening it up using screws provided in the kit.
Secure strike plate: Place a strike plate over the latch bolt holes opposite to where they protrude through onto another surface (usually on a frame). Tighten them securely.
Insert batteries: Put four AA batteries into their compartment located on top of its internal mechanism part which is mounted behind its front faceplate panel for easy access later in case battery replacement or maintenance needed.
Attach exterior assembly: Fixate external parts facing outside by sliding along guiding grooves until clicked firmly onto inner-mounted components now exposed at this stage after step 4 above; finally secure each fastening screw tightly but without overtightening deliberately which may cause damage while trying not leaving any loose either so as nothing rattles afterwards!
Your Hornhill smart lock installation is complete! You can now test if everything works properly together like unlocking/locking with supplied keys or codes whichever preference suits best such as keycard fobs etc., testing turning knobs handlebars smoothly when locking/unlocking positions reached successfully having no obstructions preventing movement back & forth accordingly depending upon desired functionality opted during set up configuration process earlier!

Trouble-shooting Tips During Installation of the Hornbill Smart Lock
During the installation of your Hornbill Smart Lock, you may encounter some issues. One common problem is the lock not pairing with your smartphone. Make sure that Bluetooth is enabled on your phone and that it is within range of the lock. If the lock still won’t pair, try resetting both the lock and your phone’s Bluetooth settings.
Another issue you may face is difficulty in fitting the lock onto your door. Make sure that the door is properly aligned and that there are no obstructions preventing the lock from fitting correctly. If necessary, adjust the door or remove any obstacles.
If you encounter any other problems during installation, refer to the troubleshooting section of the user manual or contact Hornbill customer support for assistance. It’s important to ensure that your smart lock is installed correctly for optimal performance and security.

Safety Features of the Hornbill Smart Lock and Its Benefits
The Hornbill Smart Lock comes equipped with numerous safety features that make it one of the most reliable and secure smart lock options available in the market. One such feature is its anti-peep virtual password input system. This ensures that even if someone around you tries to peek into your password while entering, they won’t be able to figure out the exact digits.
The Hornbill Smart Lock also has a built-in alarm system that sets off an alert when anyone attempts unauthorized access or tampering with the lock. This can be customized according to your needs through the mobile app.
In addition, this smart lock offers Bluetooth connectivity and remote control capabilities through the mobile app so you don’t have to worry about physically opening or locking up every time you leave home. Overall, investing in a Hornhill Smart Lock means peace of mind knowing your home’s security is top-notch!
Conclusion – Is the Investment in a Hornhill Smart lock Worth It?
Investing in a Hornbill Smart Lock is definitely worth it for homeowners who prioritize security and convenience. With its keyless entry, you no longer have to carry around bulky keys, making your life easier. Plus, with the mobile app feature, you can monitor your home’s security at all times even when away from home*.
The installation process may seem daunting at first but following our step-by-step guide will make it easy and painless. In addition to this, don’t forget to take advantage of the safety features such as the emergency power supply that ensures constant operation even during power outages or low battery levels.
Overall, we highly recommend investing in a Hornbill Smart Lock for homeowners looking to upgrade their home security system while also embracing modern technology for sleek convenience.
Note: Requires an active WiFi or Bluetooth connection
In conclusion, installing the Hornbill Smart Lock is a smart investment for anyone looking to upgrade the security of their home. With its easy installation process, safety features and benefits that come with it, you can have peace of mind knowing your family and valuables are safe. By following our step-by-step guide on how to install this lock, you’ll be able to effortlessly secure your home within minutes! Don’t hesitate any longer; invest in a Hornbill Smart Lock today and experience the convenience and security it provides!
FAQ
Question: Who can install the Hornbill Smart Lock?
Answer: Anyone can install the Hornbill Smart Lock with basic DIY skills.
Question: What tools do I need for Hornbill Smart Lock installation?
Answer: You will need a screwdriver, drill, and a measuring tape.
Question: How long does it take to install the Hornbill Smart Lock?
Answer: It takes around 20-30 minutes to install the Hornbill Smart Lock.
Question: What if I face difficulties during installation?
Answer: You can refer to the installation manual or contact customer support.
Question: How secure is the Hornbill Smart Lock?
Answer: The Hornbill Smart Lock uses advanced encryption technology for high security.
Question: What if the Hornbill Smart Lock doesn’t fit my door?
Answer: Hornbill provides multiple adapters to fit most doors, but contact support for further assistance.